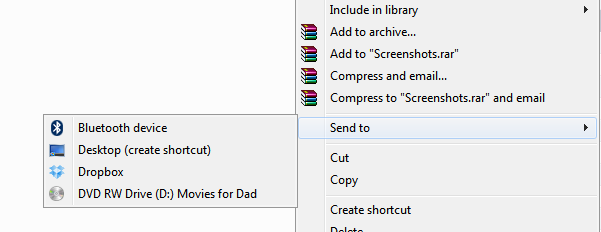
The right click context menu on Windows 7 and 8 serves as a nifty tool that helps to quickly organize yours file(s), group them, rename, delete, share or even view the properties. The sub menu named ‘Send To’ helps you to quickly send copies of the file(s) to their external storage devices, to other folders, say your cloud storage folders.

Did you know that we can manage the list of places we can send files using this option? Yes, it is possible to assign your own folders to this ‘Send To’ sub menu. Just follow the instructions below :
- Open Windows Explorer. You can do that by right clicking the Start menu or the Start button and then clicking Open Windows Explorer.
- Once the Windows Explorer opens, type %APPDATA%/Microsoft/Windows/SendTo in the navigation bar.
- You can create shortcuts for any folder here. You can create shortcuts using Right Click > New > Shortcuts option.
- The next time you right click any file or folder, you will notice destinations in the ‘Send To’ sub menu.
Thanks to Ganesh for the tip.
Do drop in your comments.
One Comment
Interesting. i am gonna try this. Earlier like a year ago , i learned to do this with certain changes in registry. But that was quite a process. This is easy . Thanks for this.