While in college, I had to prepare a lot of project reports and assignments using Word. During that time I found many handy tips which helped me a lot in my work. I am sharing some of those through this post as I think it will be useful to everyone.
Note that though I used all these tricks in Word 2007, they might also work in Word 2003/Word2010.
1) Hidden Text in Document: During your childhood you must have played with invisible ink. Well you can do something of that sort with Word as well. Word provides a similar functionality of hiding text. And it is very simple to do. Highlight the text you want to hide. Then right click -> font. In the Effects section, look for Hidden and select it. Lo!! Your text is gone.
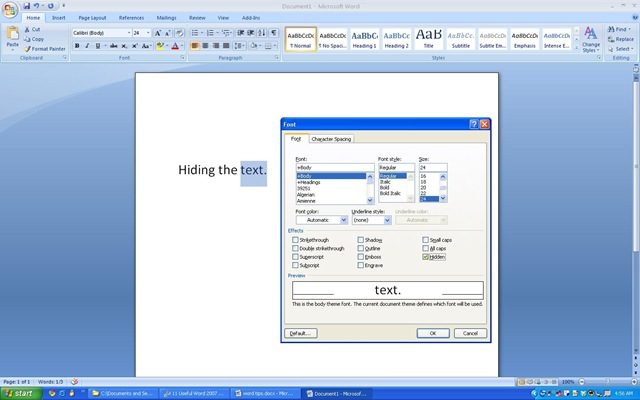
To again show the hidden text select entire document by Ctrl +A , right click->font and uncheck the `Hidden’ option.
Where it is useful: Suppose you want to get two printouts of a document you created, but in one copy you don’t want a particular section. Then you can use this option to get the printout. Or if you want to hide a section for now but preserve it for future reference then instead of making two copies you can use this method. Note however that if you are sending the doc file as a soft copy then anyone knowing about this feature can unhide and see what all text was hidden.
2) Check for Sensitive Information: Because of the last line mentioned in the above point, you should always check your document for any hidden text and other sensitive information(which may include names of people who worked on the document, name of the person who most recently saved the document, date when a document was created etc) that you might inadvertently send. Doing this is pretty simple. Go to Office Button at the top left corner; go to Prepare->Inspect Document.
3) Change Default White Background Color: Make your document stand out of the crowd by changing its default background color. Go to Page Layout tab in the ribbon. Go to Page Background group. Click on the arrow next to Page Color command. From here you can choose the color of your choice. Word also changes the text font color based on the background you choose.

4) Add Drop-Cap: For some more customization to your document you can add Drop Cap in your document. Drop Cap is a large capital letter at the beginning of a document. To do so, go to Insert ribbon, in the Text group select Drop Cap command.
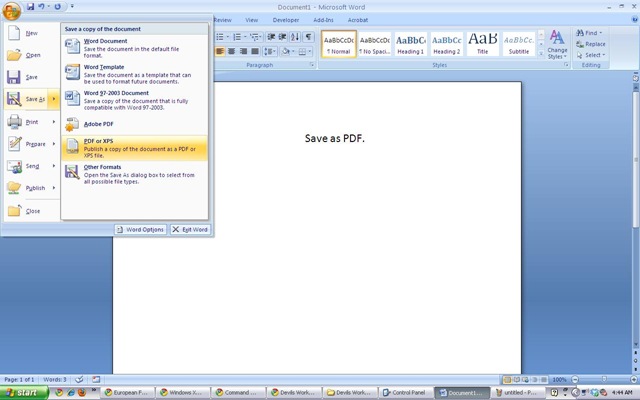
5) Save as PDF: You prepare a document, apply all those formats and styles to make it look different and send it through e-mail to your prof/boss. But what if he has a different version of office installed? Some of your settings might not show properly then. To avoid this it is always better to use pdf version. Though you can always use free pdf convertors to convert your document to pdf, you can also download Microsoft’s free Save As PDF Add-In. Once you install this you can save your document as pdf by going to Save As option and choosing “PDF or XPS” format.
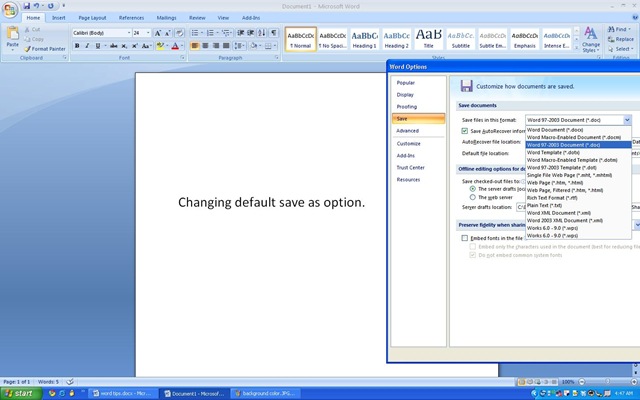
6) Default Setting for Save as Other Format: When you save a document in Word 2007 it gets saved as docx extension by default, which is not compatible with Word 2003. So if you are among those who save file with doc extension by going to Save-As option every time, there is an easy option. You can change the default “save as type” option. For this, go to Office button ->Word Option (it is at the bottom right) -> Save. There you can set the default format in which to save the file.

7) Office Compatibility Pack: If you are still using Word 2003, you should install Office Compatibility Pack to view Office 2007 documents (those saved with docx extension) in Office 2003. Without this installed, you cannot view documents created with Office 2007, because MS-Office provides only forward compatibility but no backward compatibility. You can get the compatibility pack for free from Microsoft website.
8) Change Default Location To Save File: You can change the default location where your file gets saved. By default it is My Documents. I prefer to save files on a separate drive so that when I format Windows the files don’t get deleted accidently. To do this go to Office button ->Word Option -> Save. There you can set the default location to save the file.
9) Auto Correct Options: Some Auto Correct Options that you can use in your document:
a) It is better to add a line between two sections of a document rather than leaving a space between them. To add a simple line that runs from left margin to the right margin of the page, type three minus sign on a new line and press enter. For a double line type three equal to sign on a new line and press enter. Using three tildes (~) will result in a wavy line. Try out with #, * and _ for other line types.
b) Using two minus sign (-) followed by greater than sign (>) will result in rightwards pointing arrow. Similarly you can obtain leftwards pointing arrow.
10) Customize Quick Access Toolbar: By default you see save, redo and undo commands displayed next to office button (known as quick access toolbar). You can add more frequently used commands there by clicking small downwards pointing arrow present there and selecting the command you want.

11) Select Text With Similar Formatting: You create a 100 page report and being over-enthusiastic you used bold and italics liberally in it. But your professor wants you to change everything in italics to normal. Now instead of looking for each and every italicized word, select the first italicized word you find, right-click on it, go to Styles ->Select Text With Similar Formatting. All the words in italics are now selected and you can easily change them to desired format.
I hope you will find these tips and tricks useful when you work with Word. If you use any such tricks, do share it with us.
One Comment
Can any one let me know how i can print a page with full background color. I even dont need any white space at the corner of the 4 side on the page. when i print it should print the whole page with color including all margins area also.
if anyone knows plz let me know on my email address.
thanks