NetBeans is such an awesome IDE that I use for all my WordPress projects. This tutorial will help you understand how to create WordPress project using NetBeans IDE.
I have downloaded WordPress version 3.0.1 and unzipped it to a new folder in “C:xampphtdocs” directory. I then created a database with xampp server for this demonstration. Check out details on installing WordPress on your PC.
First download NetBeans from its official website.
Now to configure NetBeans project
First we need to create a new project with existing sources.

- Now browse for the ‘Source Folder’ where we have unzipped WordPress. (eg: C:xampphtdocs)
- Then fill in your project name.
- Make sure that the check box is selected which ensures NetBeans meta data goes into separate folder.

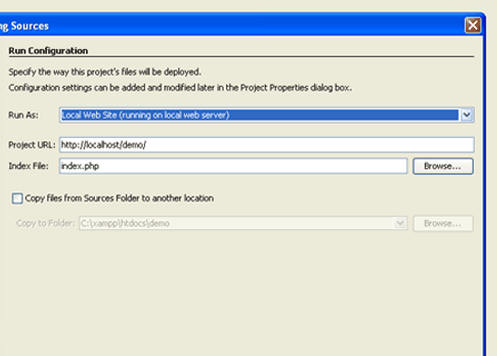
- Now we can specify if the project will run as a local website or a remote website.
- Here I have selected it to run locally. Now click finish button to complete the project.
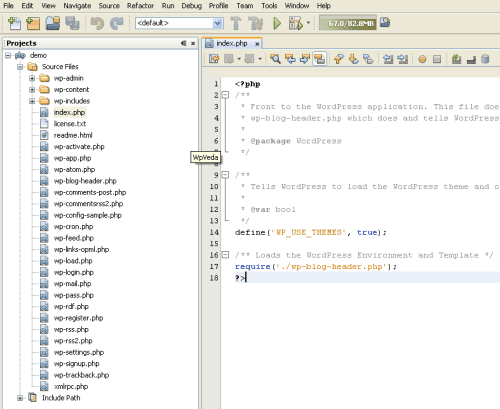
- Now the project is created in NetBeans.
Run “localhost/Demo” on the browser and we can see the website we are working on.
Advantages of using NetBeans for WordPress projects
- NetBeans IDE is built using an open source API called NetBeans Platform.
- Extensible and easy modular design.
- Vast API of commonly used tasks.
- Pre-defined update center and automatic update notification.
Do write in your views through your comments.
4 Comments
It will be good idea to have wordpress outside project files.
Ideally wordpress should be in “Include Path”
Yes, while configuring a project we should apply project URL for local project as “http://localhost/demo/wp-content/themes/ThemeName” and WordPress should be in “Include path”.
I don’t understand this …. do I need to add a folder where it says “Global PHP Include Path” already?
Getting the debugger to work and working on multiple projects is a challenge made easier with DesktopServer Limited. It includes xdebug, wordpress, apache, mysql, and the ability to give each of your projects a friendly, personalized domain name (like http://www.example.dev).
It works with NetBeans perfectly too.
http://serverpress.com/news/using-netbeans-for-wordpress-debugging-development/