In today’s photoshop tutorial, we are going to learn about the Magic Eraser Tool (E) for removing the background image. In one of my older tutorials, I had explained how to remove background images with the Pen Tool (P).
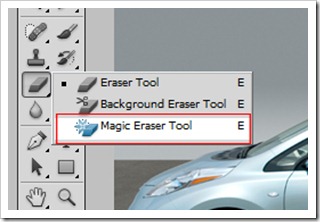
The background image can be removed by selecting the Magic Eraser Tool (E) from the tool bar. It can be selected by right clicking the eraser tool and choosing the third option.
Next, click on the background of your image. You will see that the similar, solid coloured area gets erased.
With multiple clicks, one can erase similar coloured areas. Although this may not be the perfect way to remove the background, as it works only when the background image has similar, solid colour shades.
We can now add our own image as the background by dragging a new image into the edited image.
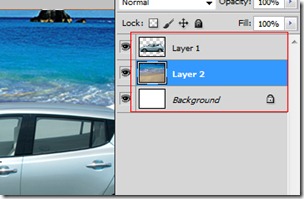
The background image can then be freely moved to the desired position. Next, in the layer palette tab, drag the background image layer below the edited image layer as shown below.
The edited image can then be moved as desired.
Try it out yourself and let me know your feedback through your comments 🙂


5 Comments
this is a useful information..thanks for sharing
Thanks for dis tip. Really useful for solid/similar color background. Removes a step from doing it via magic wand tool.
useful tips thanks
Hi, this tip helped me a lot, it is really a smart practice to erase the background with the help of magic eraser tool. thank you for giving the idea.
Great tutorial. Thanks for sharing.