Last time I shared 10 refreshing Photoshop text effect tutorials with you all, as this month I’ll write on Photoshop tutorials, so in this post I am going to tell you, how to insert images to custom shape and text. In the tutorial below I’ll draw a heart shape and will insert this image in it. Lets start :
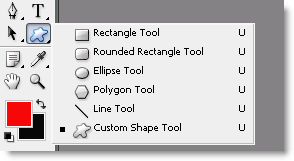
1. Open Photoshop and create a new file and from the left toolbox select Custom Shape Tool
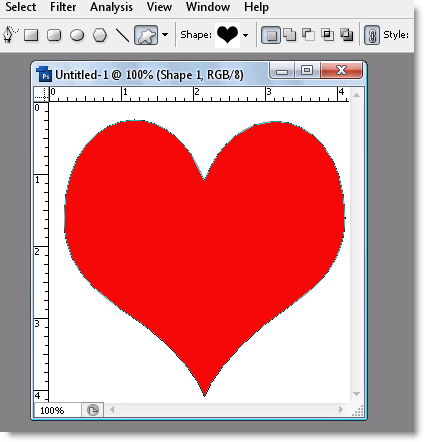
2. From the top, select your desired shape and draw it. Lets call this image as ImageA.
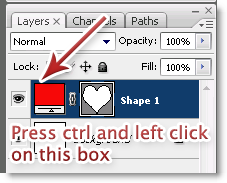
3. Select this image by pressing the Ctrl button and clicking on the box (shown below) with left mouse button.
4. Now, open the image that you want to insert it in the shape. I used this image.
5. Now press Ctrl+A and then Ctrl+C to select and copy the desired image.
6. Open ImageA again and at the top click on Edit and select Paste Into. And the image will automatically be inserted in the shape. Have a look

In the same way, you can insert this image in text also. Copy the image, write the text and select Paste Into from the top. If you are facing any problem in using this tutorial, you can use the comment box and I’ll try to answer your query as soon as possible.
Also visit Technoholic for latest updates on spy gadgets, laptops, mobiles & digital cameras reviews
2 Comments
i cnt seem to paste the image inside the custom shape..can you help me with this?..Im sure i did every step right.. :c
I tried pasting the image into shape, with your method but it does not seem to work please advise