In this tutorial we are going to see how WordPress is installed on a Media Temple Domain. It is a pretty simple task, and can be completed by following a few easy steps.
Follow these steps for installation :
- Login to your Media Temple account.
- Go to your primary domain and select domain.com (gs) Grid-Service from top menu.
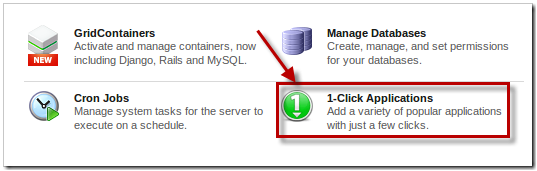
- Next, click on 1-Click Applications as shown in the screenshot.
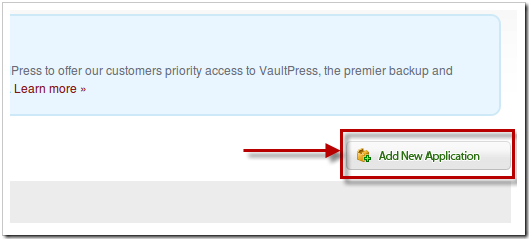
- Now Click on the Add New Application button.
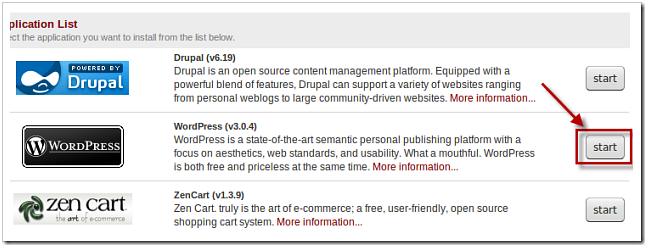
- Click on the Start button, which is located in front of the WordPress application.
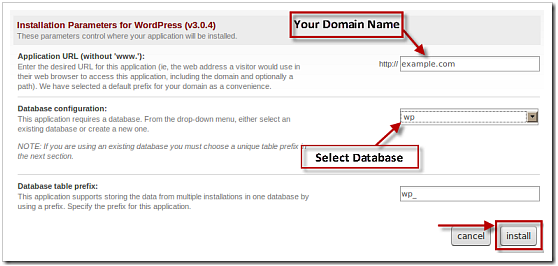
- Enter all the details of your WordPress blog in the fields shown in the screenshots below. You can select a database name for WordPress, by selecting New from the drop-down menu. You can also change the table prefix of the database.
- Finally, click on the Install button and you are almost done.
- WordPress will now get installed on your domain. Setup your new WordPress installed domain by accessing the domain from your browser.

If at some point you face difficulties in installing WordPress, do let us know through your comments. We will try our best to resolve your query. 🙂
One Comment