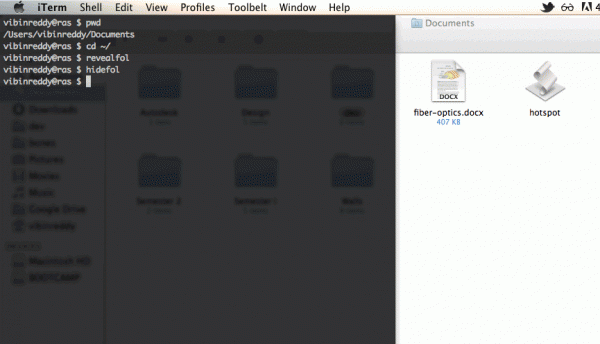
Hiding and unhiding folders in Windows is pretty easy. You get an option in Folder options in Explorer. You don’t have any such thing in Mac’s Finder and that’s why you got resort to Terminal commands for it.
Hiding and revealing folders
Like I said, you got to use Terminal for this, so open Terminal.app from Launchpad or search on Spotlight.
Once it’s open, paste this command and hit return.
defaults write com.apple.finder AppleShowAllFiles -bool true
This will reveal all hidden folders in your Mac. But you won’t see the results yet. You need to restart Finder to see the effect. To restart Finder, enter this command into Terminal.
killall Finder
You’ll now be able to see the hidden folders and files, their icons look faded and little different from normal folders/files.
To revert back, or hide folders – enter the same command you entered in the beginning, changing TRUE to FALSE, that is:
defaults write com.apple.finder AppleShowAllFiles -bool false
You need to enter killall Finder again to restart Finder once again.
Now how would you remember these commands, the next time you want to see hidden files? There’s a workaround for that too.
We’ll create a file called .bash_profile in the home folder of Mac. .bash_profile contains your preferences, aliases etc.
- Open Terminal and type
touch ~/.bash_profile - Next,
open -e .bash_profile - Once the file is open in Textedit, copy and paste this snippet into the file.
#reveal hidden folders in finder
alias revealfol='defaults write com.apple.finder AppleShowAllFiles -bool true
killall Finder'
#hide folders in finder
alias hidefol='defaults write com.apple.finder AppleShowAllFiles -bool false
killall Finder'
- Save the file and quit the app.
- In terminal, type
source .bash_profile - And you’re done.
What we have done a while ago is, create aliases for commands used for hiding and revealing folders. The aliases are revealfol and hidefol.
So, now if you typerevealfol in Terminal, it will reveal hidden folders for you.hidefol will of course hide the folders, like you expected.
Hide existing folders
Let’s say you want to create a hidden folder or want to hide a folder you already created – it’s pretty easy.
All you need to do is rename the folder or file, by putting a dot (.) before it.
This works because OS X hides all files/folders whose name starts with a dot. They’re called dotfiles.
To rename a existing folder in Mac, open Terminal and type
mv ~/Documents/secrets.txt ~/Documents/.secrets.txt
In the above command, the first argument should be the original path of file and second argument should the path of renamed file (same name with dot before it).
That’s all. If you’re a developer or someone who messes with this kind of stuff, you must have already knew this.
This tutorial was more intended for beginners. 🙂

3 Comments
If you put a dot [.] in the front of the folder [ rename ] . You can also use this method to hide the folder. BTW nice tips you have shared. Keep up the good work 🙂
I use MacPilot , its just a matter of click rather than writing the code.
Still thanks for this one.
I’m a big fan of MacPilot too. Thing is, it bugs me to frequently open MacPilot when I want to see hidden files (when Finder is already open) – and you know, you don’t get the ‘native’ feel which you get with Finder. Not to forget, MacPilot is paid.
With Bash aliases, I just type ‘revealfol’ in Terminal – and boom, Finder is up with hidden files open.