Taking screenshots is easy in Windows Mobile and iPhone, but it is complicated when comes to Android. Since Android is being one of the most used mobile platforms but while taking screenshots, it shows the errors. There are several apps to do this, but all apps need your phone to be rooted.
As rooting destroys the manufactures warranty of your phone and many such other issues, lots of people like me, do not root their phone.
Here we will guide to take a screenshot in any android phones without rooting.
Using Android SDK
- Connect your phone to your PC
- You must have the Android SDK installed in your computer. If not, you have to install it from here (make sure that your Java developer kit is updated). You can read a complete tutorial on how to install it, from their official page .
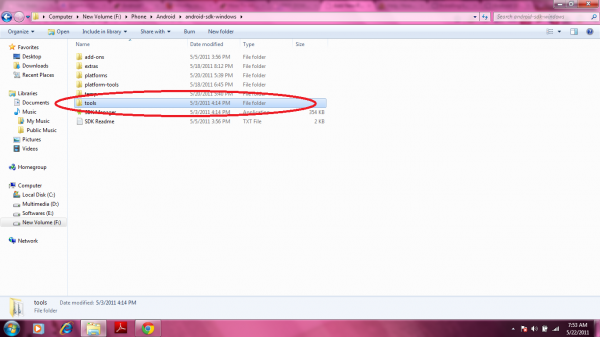
- Open the folder where you have the Android SDK installed and navigate to -> Tools

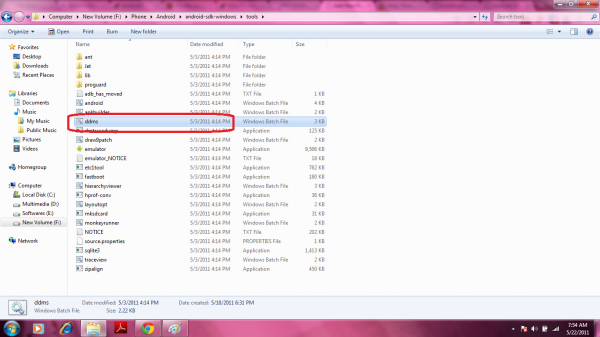
- Now open the file named ddms in it
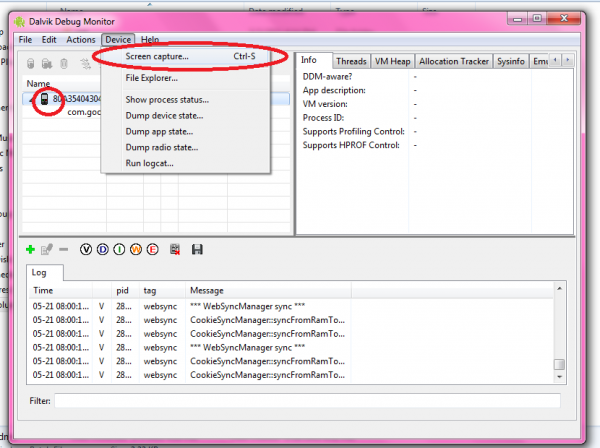
- Now in the device list provided, select your device and go to Device -> Screen Capture. Alternatively, you can do this by tapping Ctrl + S together.
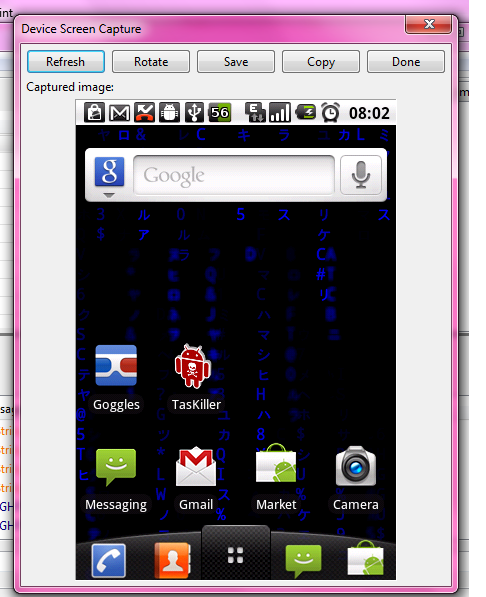
That’s it ! You got the screenshot ! You can save it, rotate it, copy it. Once you have installed the Android SDK manager, you just want to follow the steps 4 & 5. Since you can directly get it into the computer, it i’s really easy to share or post on blogs tutorials etc.
Hope this tutorial had helped you.
Link: Android SDK


3 Comments
Loved the way you explained everything using screens.
🙂 Thanks Man, I used screenshots so that it’ll be easy for the readers to understand it. Hope it worked 😉
Thanks much. The post was very helpful (specifically the screen shots).